
The Sparrowscope has been an engineering project for most of its life, but for the past few weeks, horizons have expanded. I’ve decided to put the Sparrowscope as a product on Kickstarter, which has involved filming, audio recording, product photography and video editing. I’ve done none of the usual programming, soldering, finite element analysis, control loop tuning, or any of the other engineering tasks I got used to, which has been a nice artistic break. The Kickstarter project will be public soon enough (and I’ll post a link), but I thought it would be fun to share some of the behind-the-scenes looks at what I’ve been doing, and maybe help people out who are working on their own crowdfunding campaigns.
With friends to help me and lend some equipment, as well as a few rentals, it was possible to put together a decent-looking video without spending a fortune. What you need are patient friends, good lighting, a decent camera and some good sound equipment.
Filming
A bunch of my friends made this video possible—on set were Alyssa, Anthony, Audrey, Dana, David, Evan, Juliana, Justina, Mojan, Nic and Winnie. Thanks everyone! Sadly, a few of them spent a long time doing some great acting and didn’t make it into the short video, but I really appreciate their work. And when they weren’t acting, they were an amazing crew: monitoring sound, running the camera (when I was in front of it), doing set design, giving advice, holding DIY reflectors… even some costume design! Check it out.

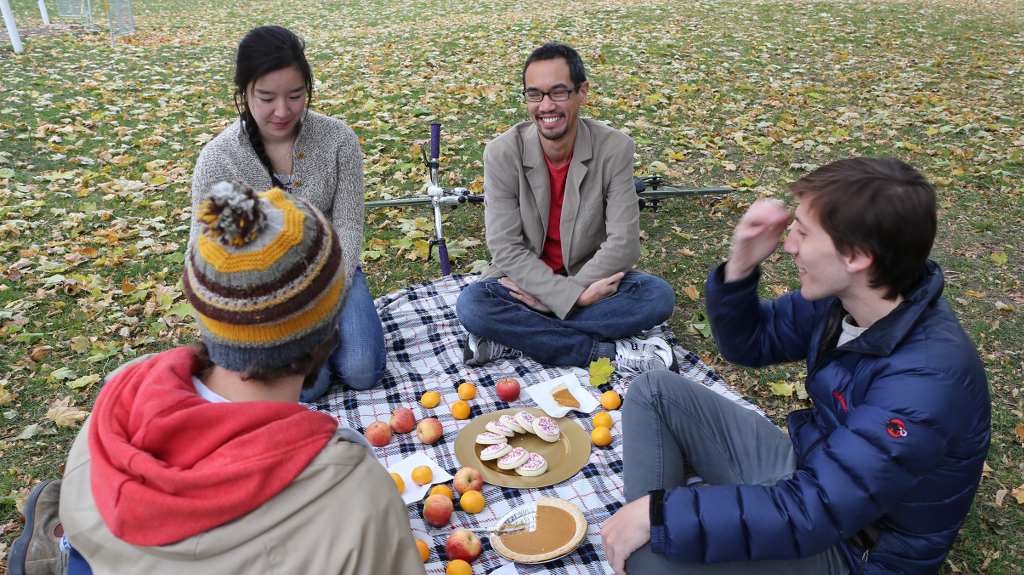
The reflector you see in the first photo is just a piece of cardboard with a coating of spray adhesive and aluminum foil. The dull side of the aluminum foil turned out more useful than the shiny side, but I had both just in case. This light stopped the shadow on the side of my face from being too dark in the video; but we learned that too much light can make the scene look unnatural as well. If you can, bring a laptop with you and check the test footage on set.
Will lent me the greatest camera I’ve ever held, but loads of DSLRs these days will shoot video and if you can’t borrow one, look for a rental. I rented some audio gear so that wind noises wouldn’t be louder than me, which really pays off. That fancy gear as operated by my very talented friends pushed the production value through the roof, but this was really all done on a shoestring budget. The zeppelin (the fuzzy thing covering the microphone), boom pole, microphone and portable sound recorder were rented for a total of around $60. Totally worth it.
Product photography
I’ve never done product photography before, but thankfully there was enough instruction online to get me most of the way, and Anthony answered my photography questions. Here’s what the scene in my apartment looked like:
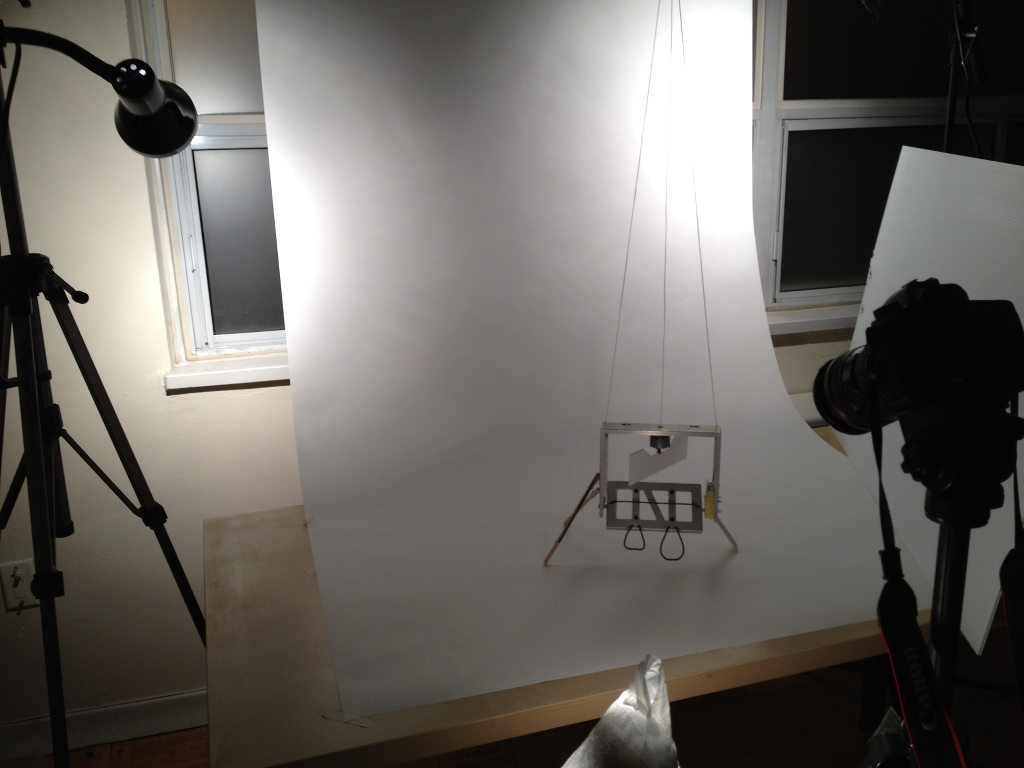
It looks dark in this picture, but the DSLR gets enough light in and the draped white paper (I put a roll from the craft store on my curtain rod) gives a seamless white backdrop.
Those are just clip-on light fixtures from the hardware store fitted (temporarily!) with PAR-20 halogen flood lights; with one mounted on my microphone stand and the other on Anthony’s tripod. The idea is to have a well-lit background reflecting light—after some adjustments, you’ll get it to the point that there aren’t harsh shadows around your subject and it’s picture-taking time. Foreground lighting is provided by a halogen desk lamp diffused through tissue paper.
I used aperture priority (Av on the camera dial) with the smallest possible aperture (biggest number) to maximize how much is in focus. I adjusted the exposure so that everything looked bright without having blown out (ie, completely white with no detail) areas of the photo—cameras have a feature to highlight over-exposed areas which comes in handy here, check your manual for how to turn this on.
The resulting picture only needed a little bit of white balance correction; Gimp‘s automatic white balance feature did a great job for that with no effort on my part.
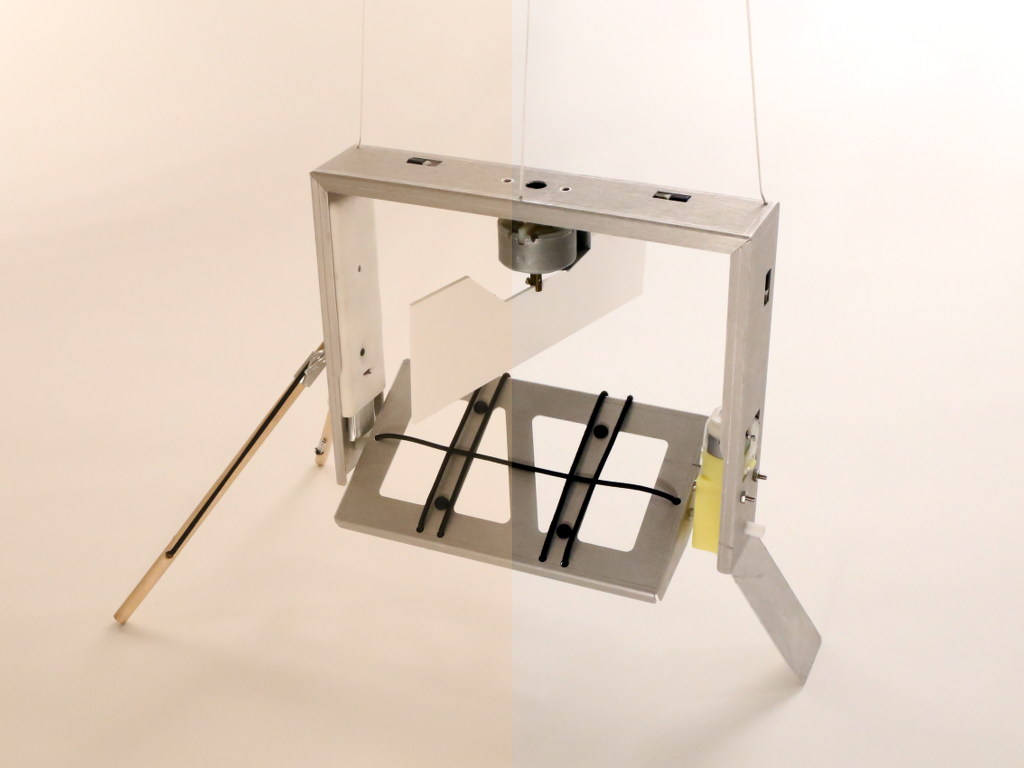
The left side of the image is directly from the camera, and the right side is after white balance correction.
The tools for making a good-looking video are cheaper and more accessible than ever. I hope this gives you some ideas and inspiration for your own project. Let me know if you find this post helpful when putting a video together; I want to see the video you make! Good luck.